
Learning how to clean baby toys after illness enables you the guardian to eliminate any contaminated surfaces, that could cause reinfection and render your toddler unhealthy once again.
Also, cleaning toys after illness ensures that other surfaces are not infected as the baby interacts with the toys, floor, and other surfaces in the house.

However, there are numerous ways to clean baby toys after an illness. From natural means to using vinegar or bleach and all these choices can bring confusion into what you should do.
So, which is the best way to clean baby toys after illness and what should you carefully watch out for when cleaning baby toys?
We give you a detailed process of the material, steps, advantages, and disadvantages involved to keep baby toys clean after an illness.
Table of Contents
Why should you clean Baby toys after illness?
A lot of germs are spread through direct contact with contaminated surfaces or objects. By cleaning your baby toys, you remove the germs from the surface so they do not gain access to your child’s body.
Cleaning toys removes baby toys after illness removes visible dirt from baby toys.
Cleaning toys after illness prepares toys for disinfection whose outcome deletes 99.99% of the germs and microbes on the toy.
10 Best ways to clean baby toys after an illness
1. How to clean baby toys after illness with bleach
Bleach is an excellent cleaning agent after illness. Although it works well on toys, it is inappropriate for hard plastic or even metallic toys.
Materials needed
- Household Bleach (-or equivalent chlorine-based product such as Clorox Disinfecting Wipes
- An old toothbrush/toothpaste brush
Steps to follow
Step 1: Add water to a bucket or basin
Step 2: Add 1 tablespoon of household bleach powder
Step 3: Put the baby toys in a bucket with water such that they are fully submerged
Step 4: Let the toys soak for at least 5 minutes to eliminate germs, microorganisms
Step 5: Rinse in clean warm water to remove bleach residues
Step 6: Wipe with a clean dry cloth and let the toys dry in a well-ventilated area
Pros
- Excellent fit for bath toys, plastic toys, plush toys, waterproof electronic toys
Cons
- Eye and skin contact with bleach can cause irritation or allergies
Learn More from BestToyLine: How to Clean Toys for Infants
2. How to clean baby toys after illness with Vinegar
Vinegar is great for removing stubborn stains or getting rid of odors.
Materials needed:
- Vinegar
- Water
- Toy Cleaner/Wash Soap
Steps to follow
Step 1: Mix 1 cup water with 2 cups vinegar in a bowl until all lumps disappear. This will take about 5 minutes. Do NOT add any soap at this point because we want our solution to be very acidic.
Step 2: Add 4-6 drops of dishwashing liquid. Stir thoroughly. Make sure there aren’t any bubbles left over from stirring.
Step 3: Put your toys into the container. I usually put them in a large Ziploc bag, so that they do not get scratched up too much while being washed.
Let them sit overnight. The next day, rinse off the toys with warm running water. They should come out quickly now!
Step 4: Wash again with hot water. Dry thoroughly before storing away.
Note: Some people recommend putting toys in the refrigerator first, then washing. However, I have found that my kids’ playthings do just fine without refrigeration. Just make sure to flush immediately afterwards.
Also, note that Vinegar has been known to stain clothing, so keep an eye out for stains when rinsing clothes.
Pros
- Gets rid of foul smell
Cons
- Can stain clothes if you are not careful
3. How to clean baby toys after covid-19 illness
What is the safest way to wash a child’s toys when you cannot use soap, especially after covid-19 illness? Let alone hand washing or sanitizing, etc.?
You are probably asking yourself these questions. Well, we have the best solution for you. Check our tips below on how to clean baby toys after a covid-19 illness.
Materials needed
Bowl, Water, Sponge/Broom, Spray bottle filled with warm water and mild detergent, Toy cleaner, Toothbrush, Cotton balls, Soft cloth, Paper towel, Plastic bag, Tape, Scissors, Knife, Small bowl filled with salt, Dryer sheets, Baking soda, Dishwashing liquid, and Hand dryer
Steps to follow
Step 1: Fill up the bowl with hot tap water. Add some dishwashing liquid to make sure the toy does not get wet. You will also have to add some baking soda for odor removal.
Step 2: Put a plastic bag over your child’s favorite toy. Make sure there are no sharp corners or edges around the opening. If possible, tape the plastic bag closed. This prevents any spillage from happening later on.
Step 3: Next step is to fill up a spray bottle with warm water and mild dishwashing liquid. The mixture should look like this: Warm water + Mild dishwashing liquid Washing solution.
Step 4: Take a sponge or broom and start scrubbing away at the surface of the toy. Do not rub too hard as you do not want to scratch the paint off. Also, try to avoid getting the dirt inside the seams of the toy.
Step 5: Once done, rinse thoroughly under running water until the entire toy is completely clean.
Step 6: Place the toy in another container filled with warm water mixed with dishwashing liquid or baking soda. Allow the toy to soak overnight. In the morning, remove the soaked item from the container and allow it to air dry.
Step 7: Now comes the fun part; removing stains. Use a soft cloth dipped in cold water without rubbing anything onto the color.
When finished, place the stained area in a small bowl containing ½ cup table salt. Leave it for 15 minutes before rinsing again with cool water. Repeat this process twice more.
Then, wipe down with paper towels. Finally, apply several layers of dryer sheets. Wait for 30 minutes, then vacuum it up.
Step 8: For extra protection against germs, cover up the toys with plastic bags. Store them in an upright position.
Pros
- Easy to use and safe since this method removes a lot of germs, viruses and bacteria
Cons
- Takes a lot of time, requires patience
4. How to clean baby toys after they vomit?
If you have toys such as stuffed animals or soft cuddly toys, then how to clean baby toys after they vomit is easily the best option.
The other option, of course, is bleaching them: this is the one that I recommend.
However, if you have very many baby toys, then bleach can get expensive and irritating to keep having to buy more, so it’s a good idea to use Vinegar and alcohol as well as bleach: best to be prepared, you know!
Materials
- Warm water
- Powder laundry soap (without bleach or any harsh chemicals)
Steps on how to clean baby toys after vomit
Step 1: Thoroughly soak the toy in warm water. How long this takes will depend on the size of the toy and just how dirty it is. Soak until you can see that all or most of the vomit has been removed.
Step 2: Allow the toy to soak for an hour and then wring out as much water as possible without damaging it.
Step 3: Use your powder laundry soap to rub the toy and then wash it in the machine.
Pros
- Cleaning toys help prevent the spread of the virus
Cons
- None available.
Best way to clean baby toys after illness naturally
If parents want to go down the all-natural route, in other words, they want to use how to clean baby toys after an illness that has no chemicals at all.
Then it is recommended that warm salt water is all that is needed with a good rinse. Wash-up liquid can also be used, as well as lemon juice and white Vinegar.
5. How to clean baby toys after being sick in the washing machine?
It is also worth noting that cleaning baby toys after being sick should be accompanied by a good wash of all clothes that have come in contact with the child.
Whether they’ve been sitting on their lap or crawling around the floor – if any infection is present, then it could spread very quickly.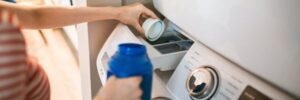
It’s a good idea to wash them at 60 degrees with how to clean baby toys after an illness in mind, and then hang them outside for good air circulation.
Materials needed
- Non-bio washing powder
- Clean towel to dry toys using how to clean baby toys after being the sick method
Steps on how to clean baby toys after being sick in the washing machine
Step 1: If the baby toys come into contact with vomit, it’s good to soak the baby toys with warm soapy water and leave for a few hours. The procedure aims to get all the dirt off without getting any of the cleaning products on it.
Once dry, cleaning baby toys after being sick in the washing machine process can proceed.
Step 2: Put all the items to be washed into a clean plastic bag and add the non-bio washing powder – about half a cup is recommended. Seal up the bag with tape or by closing it tightly, so there are no leaks.
Step 3: If you have a washing machine, switch it on and put the bag in – if not, place it into the washing machine drum.
Step 4: Add some cold water to get things moving and ensure that all liquids have been mixed with the powder correctly. Set the washing machine to the lowest temperature, which is safe for the items that are being washed.
Step 5: Once the cycle has finished, cleaning baby toys after being sick in the washing machine can be taken out and given a good rinse under cold water with some fresh air drying afterward.
To avoid getting any infections or illnesses, you should wash all clothes which have come in contact with the child. This includes t-shirts, trousers, and even underwear, as they could be carrying germs.
Cleaning baby toys after being sick can be done in a 60-degree wash and air-dried – ideally, get them outside for good air circulation.
Pros
- Washing machines are easy to use
Cons
- Toys can get ruined if you wash them too much
6. How to clean toys after the baby is sick by boiling?
It is also advised that anyone who has been in contact with an infected baby or child should ensure that the baby toys are thoroughly cleaned.
This needs to take place soon after the illness first appears – preferably within the first 24 hours.
But how to clean toys after the baby is sick in a boiling water bath over an open flame will kill anything which may have taken hold.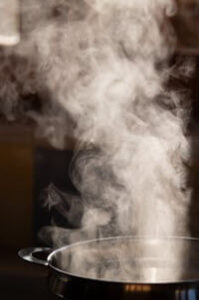
Materials needed
- A large saucepan or bucket
- Disinfectant bleach
Procedure on how to clean baby toys after being sick by boiling
Step 1: Boiling baby tops is a traditional way of disinfecting objects. It is done by getting a large saucepan or bucket, filling it with water set on a gas stove about half full of water, and bringing the temperature up until it boils.
Step 2: Put the clean sheets into the water for 30 minutes and ensure they are entirely submerged.
Boil, the baby, tops at least two times a week unless you believe the infection has been addressed.
Pros
- The process kills viruses, bacteria, fungi, protozoa, etc.
Cons
- The method can be dangerous if not handled properly, as some chemicals used during this procedure could cause burns.
7. How to clean baby toys after illness by freezing them
If you have stuffed animals that cannot be washed – for example, they are made of fur – then freezing is an excellent option because it will kill off any bacteria without making the skin stiff or clumpy
Materials Needed
- Freezer
- Parchment paper
- Baby wipes
- Small bowl with warm water and soap
- Mixing bowls
Steps to follow
Step 1: Set up your freezer by placing all materials in one order on top of each other inside the freezer.
Make sure there’s enough room between them so air can circulate them while frozen. This way, when you take out the items from the freezer later, they will not stick together like sardines!
Step 2: Take a small piece of parchment paper and fold it over both ends to make a seal. Place this folded end into the middle of the material group you want to freeze.
The sealed side should face down towards the bottom of the container. Repeat until all groups are covered
Step 3: Put everything back into the freezer overnight. Once frozen solid, remove the containers from the freezer and place them in the fridge for about 24 hours.
When ready to use, simply unwrap the items and put them directly into the washing machine. Rinse as usual. If using plastic storage bags instead of wrapping individual pieces separately, wash them before storing them again.
It doesn’t matter what method you choose. Your goal here is to keep things fresh until needed.
Pros
You don’t need detergent or fabric softener, which means no chemicals. Also, if you’re worried about contamination, this process kills 99% of germs.
8. How to clean baby Toys After a Cold
Many parents will tell you that they don’t have time or energy for cleaning their kids’ toys. But, if your child has an illness like the common cold or flu, it’s essential to keep his toys as germ-free and sanitary as possible.
This article contains instructions on disinfecting toys while keeping them in good condition for when he is better.
Materials needed
You’ll want some kind of container with lids, such as a plastic food storage bin, a large zipper bag, or even just a regular old garbage can lid.
Guidelines to follow
1. Cleaning Your Toys Before Disinfection
First things first – before you start treating any of these toys, take care of all the parts that could have been contaminated by germs.
The easiest way to do this is simply to wash everything thoroughly using soap and water. Make sure you scrub every surface well, including inside seams where dirt may accumulate over time
2. Remove stains from the baby toys
Use rubbing alcohol to remove stains from the baby toys.
Put several drops of alcohol into each toy and seal tightly; let sit overnight.
Rinse off thoroughly with warm soapy water.
3. Washing them In A Toy Bag
Once you’ve cleaned everything else up, now comes the fun part – putting together those cute little outfits for your kid.
When doing laundry, place baby toys in individual bags instead of mixing them.
That way, you won’t accidentally mix dirty toys with clean ones, which would lead to cross-contamination.
Place clothing in separate drawers, too, since bacteria grow faster on dark surfaces than light ones.
4. Using Baby Powder As An Anti-Bacterial Spray-On Toys
If you happen to have some extra baby powder lying around, try spraying it onto toys before storing them away.
Once dry, toss the powder into the trash because it doesn’t provide long-lasting protection against germs. However, it does help prevent dust mites from growing on fabrics.
5. Making Sure All Parts Are Dry
One last step you should take before tossing anything in the closet is ensuring that no moisture remains anywhere.
Even though most toys aren’t made entirely waterproof, they still must dry appropriately before being stored. Soak toys in hot water until fully saturated. Let air dry for 24 hours, then keep.
Pros
- You do not need an expensive machine.
Cons
- The process takes longer due to slower evaporation rates.
9. How to clean electronic toys after illness
Materials needed
- Disposable gloves
- Dustpan & Brush
- Sponges
- Vinegar
- Soap
- Old toothbrush
- Rubber Gloves
- Towel
Steps to follow
Step 1: Remove all dust that may be stuck to the electronic toy. Using disposable gloves, sweep the electronic toy with a dustpan and brush.
Try to keep the brushes away from moving parts such as buttons, knobs, etc.
Step 2: Wash the electronic toy with Vinegar. To prevent damage to the finish, first, turn off the power switch if applicable.
After washing, let the gadget sit for about 10 seconds, so that excess moisture evaporates.
Next, wash the baby toy with soap. Again, leave it alone for ten seconds. Let the unit drain well before drying.
Step 3: Rinse the electronic toy with clear water and repeat steps two and three.
Dry the electronics toy using a towel.
Step 4: Reassemble the device following manufacturer instructions.
Pros
This is an easy way of keeping your baby safe and happy while also protecting their environment. It will help avoid unnecessary clutter in the house and ensure they don’t get into anything dangerous.
Cons
It will not remove all germs or bacteria, but it does make sure you are not passing on those nasty bugs to your child. You should never forget to put everything back together correctly after use.
You could try disinfecting the toys yourself at home rather than sending them out to have them professionally cleaned.
This would involve soaking the toys in warm soapy water overnight then rinsing the next day thoroughly.
However, this method isn’t recommended because there is no guarantee that the entire item has been successfully sanitized.
10. How to clean bath toys and plastic toys
Solid plastic toys, like rubber rings, animal figures, and building blocks and bricks can easily be cleaned in your dishwasher’s top rack. Here’s how:
Materials needed
- 1/2 cup of Vinegar
- a sponge or rag
- soap for cleaning the surface
- rubber ring toy
- plastic dog figure
How to do it
Step 1: pour half a cup of White Vinegar into the bottom tray of your dishwasher.
Make sure that there is no soap residue on the inside of the dishwasher; if you have any leftover liquid from previous loads, add this to the Vinegar as well.
Step 2: place your solid-colored piece of hardware into the middle hole of the dishwasher, making sure to avoid getting water onto its surface by placing it at least 2 inches away from the edge of the machine.
If necessary, remove all pieces of clothing before putting them into the washer, so they don’t get wet.
Step 3: set the cycle time to “normal” and run the load with warm water only. The hot rinse will damage delicate surfaces such as jewelry, silverware, and wooden utensils.
Step 4: Once finished, turn off the power switch and let the items dry overnight. You may need to repeat steps one through three several times until the thing has dried completely.
Pros
This method works great for most types of solid-colored objects, including metal, wood, glass, ceramic, porcelain, and more. It also works very well for non-solid colored toys.
Cons
Some materials are not recommended for use in the dishwasher because they could break down over time due to chemical reactions within the wash cycles.
These include certain plastics, some fabrics and leather products, and some paints. Items made out of these materials should always be hand washed instead of put in the dishwasher.
Conclusion
Cleaning and disinfecting baby toys after illness through bleaching, using vinegar, and through natural ways, is very important and helps in the control of spread germs that may result in illnesses.
When not handled properly, these germs result in the spread of communicable diseases, especially in a child care setup.